Vixel: Smarter Sprite-like Rendering on the VIC-20
A downloadable game

Vixel is a streamlined library for Turbo Rascal, making it simple to draw sprite-like graphical objects on the Commodore VIC-20 with minimal flicker. Traditional methods erase and redraw entire sprites, often leading to visual glitches when the raster beam refreshes mid-frame. Instead, Vixel implements a technique used in classics like Jet Pac, updating bitmap data line by line.
This approach keeps sprites visible at all times, preventing the typical flickering or disappearing artifacts. No need to sync with the raster beam or squeeze updates into a vertical blanking interval—Vixel frees up processor time for animation, logic, and gameplay, keeping your visuals smooth and stable.
Perfect for high-speed action games or retro experiments, Vixel ensures crisp graphics without the usual VIC-20 sprite headaches.
Guide to getting started
Download the zip file and unpack to a folder to open the Vixel project in Turbo Rascal.
Draw a sprite (or two)
Turbo Rascal has editors to help make graphics and use the in your projects. These can be created using File - New file - Image/charset/sprite. The Vixel project has a ready made sprite sheet in the spr folder, open sprites.flf to take a look.
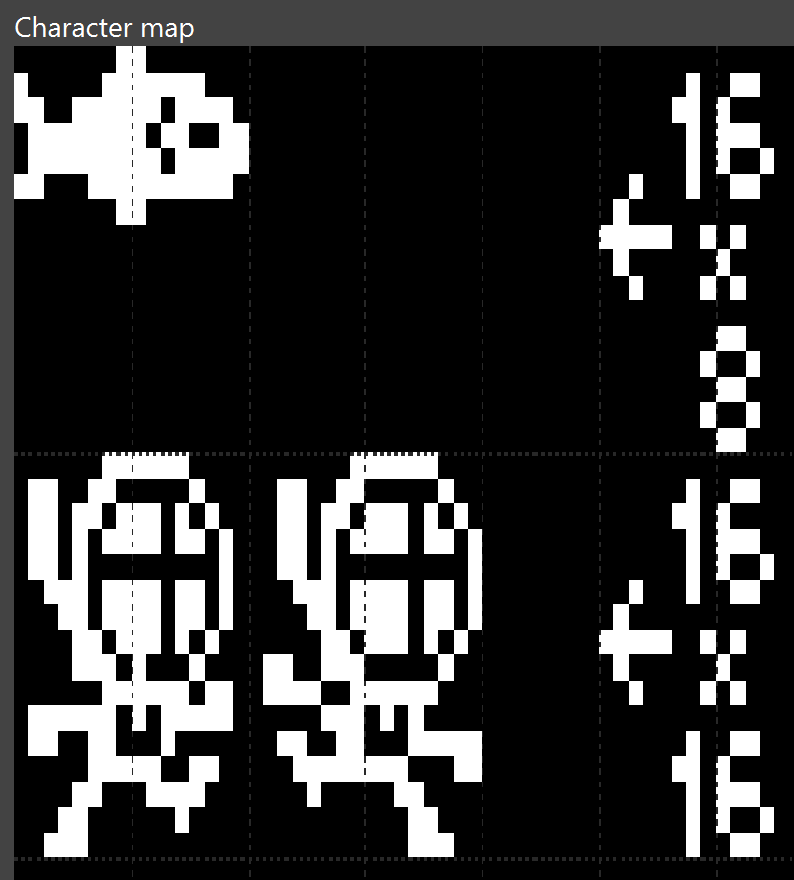
Here we have three sprite images - a fish called bob, sized 16 x 8 pixels, and two animation frames for Rinso the deep sea diver at 16 x 16 pixels in size. If you don't see the above image, press the SPACE BAR to toggle between character view and canvas view.
Turbo Rascals graphical editor works in units of character cells. The fish and the diver are drawn into the character cells on the image.
Let's focus on Rinso, the first image starts at character boundary 40 (you can see this when hovering the mouse over that area) and the second image at character boundary 42. They are both 16 x 16 pixels in size, which is equivalent to a grid of 2x2 characters. This is the information we use to export the images to binary.
Export the sprite images
To export Rinso to use in a game, we need to extract the image data and store as a binary file. This is easy to do in Turbo Rascal:
@vbmexport "spr\sprites.flf" "spr\vixel0.bin" 40 42 2 0
const VIXEL0: address = $7000;
bin_vixel0: incbin("spr\vixel0.bin", VIXEL0);
The first line uses @vbmexport to extract character data starting at 40, ending before 42, 2 characters tall and the flag 0 at the end is to extract hi-res data. Look up the command in Turbo Rascals help file to find out more.
Next a constant called VIXEL0 is declared which is the address where we will import the binary data we extracted. We could let Turbo Rascal decide where to put the image in memory, but in this instance we will define the location ourselves.
Finally we tell Turbo Rascal to include the binary at the address defined in the VIXEL0 constant. We'll also use this constant later.
Now export the other image of Rinso to use to animate them on screen.
@vbmexport "spr\sprites.flf" "spr\vixel1.bin" 42 44 2 0
const VIXEL1: address = $7020;
bin_vixel1: incbin("spr\vixel1.bin", VIXEL1);
This is similar, but exporting from characters 42, ending before 44 and the constant for this one is called VIXEL1.
Including the Vixel library
Near the top of the program, around where variables are declared, tell Turbo Rascal that we wish to include the library in our project. Do this with the @use command:
@use "vixel"
Setting up the code
Vixel needs a bitmap to draw the vixel sprites to, and has been designed to work with Vic Bitmap Mode (VBM) built in to the language with Turbo Rascal.
DefineScreen();
vbmSetDisplayMode( 0 );
vbmClear(0);
vbmClearColor(WHITE);
AUX_COLOR_AND_VOLUME := $aA;
SCREEN_BG_COLOR := BLACK + SCREEN_BG_LTBLUE;
vixel::Init();
The first two commands set up VBM with screen mode 0. There are several that could be used but Vixel has been designed to work with mode 0.
The bitmap is cleared and colour set to white. We next set up some colours for the screen.
Finally we're ready to initialise the Vixel library with a call to vixel::Init();
Spawning a vixel!
Vixel manages your sprite characters for you, when to draw etc. We need to spawn or create an entry for our vixel.
vixel::Spawn16( 0, 80, 20, 15, #VIXEL0);
There are two commands available to do this, Spawn8 and Spawn16. They specify if we're adding an 8 pixel wide or 16 pixel wide vixel. For Rinso we want to spawn a 16 pixel wide vixel.
The parameters for the spawn command are:
- The slot we wish to create the vixel in, here it is slot 0. By default you have 10 vixel slots (0 to 9) but you can change it to as many as desired. Each slot needs some memory so bear that in mind. Use @define numVixels 20 to specify how many you want to have.
- Next the starting x position for the vixel on screen (values 0 through to 175), here it will start at pixel position 80.
- and then the starting y position, position 20 in this example.
- A vixel can be any height (1 through to 191 pixels), specify the height and subtract 1. Here 15 means the vixel will be 16 pixels tall.
- Finally, specify the address where the binary image data can be found. Here we are referencing the constant VIXEL0 we defined earlier to include the binary into the project, and it is prefixed with a hash character '#' to tell Turbo Rascal this is the address we are passing.
We're now ready for our game loop!
The game loop
The loop needs to process all the things that will happen in our game. For this example, this will be to move the vixel and change the image used to display it to create animation.
The loop in the example will run forever, and is define with a while statement:
while(1) do
begin
...our code...
end;
Inside the loop we can change the position of our vixels. To move Rinso, which is in vixel slot 0, change these properties:
vixel_spr[0].nx
vixel_spr[0].ny
For example, to move the diver to the right, increase the value of nx:
vixel_spr[0].nx += 2;
We've told Vixel to use the address specified by the constant VIXEL0 and the image at that address will be used to draw it each loop. To change it to another image, for example the address the constant VIXEL1 points to, we need to change two properties of the vixel in slot 0:
vixel_spr[0].nsh := hi(#VIXEL1);
vixel_spr[0].nsl := lo(#VIXEL1);
The nsh property needs the high part of the address and nsl the low part of the address. This is done with the hi() and lo() functions respectively.
To update the screen with any vixels that have moved or changed shape to a new image, we need to call one command:
vixel::Update();
This processes all spawned and active vixels. It can skip over any that have not changed, and this is all done automatically. As long as you call the Update() command, Vixel will take care of the rest.
Destroying a vixel!
When you no longer need the vixel to be on screen, use the Destroy() command to remove it. To remove vixel in slot 0, use:
vixel::Destroy(0);
Summary
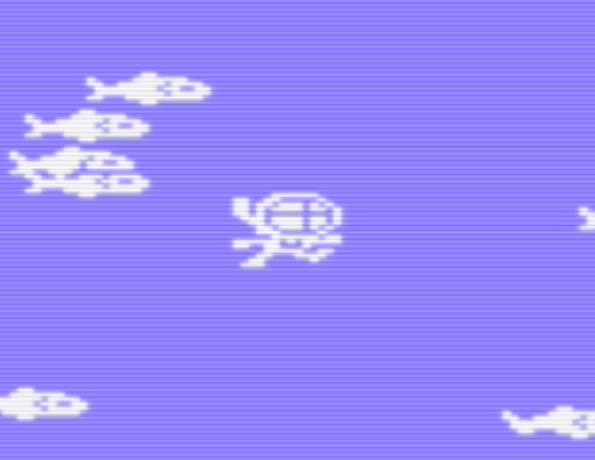
And that's it. There are two examples contained in the project that shows the commands working. Example1 is just one vixel so you can get your bearings. Example2 adds loads of fish that all move on alternating frames in groups of 4.
This first version is a beta. I will be adding a screen mask so vixels can go behind the scenery in your game, as an optional feature.
As it is beta, I'd love to hear your feedback. Can the library be improved? Let me know!
Download
Install instructions
You need Turbo Rascal to use this library. Unpack the zip file and open the project in Turbo Rascal. There are two example files to demonstrate how to use the library and an example sprite sheet.

Comments
Log in with itch.io to leave a comment.
Thanks AndyH Its great to keep the Vic20 alive...
very good
Hi Andy, I'm going to check it out now. Looks pretty cool.